Overview
The optical fibers received from Saint Gobain Crystals are shipped via large diameter cardboard spools. As a result the optical fibers, when unspooled, tend to have an intrinsic curvature to them. It is very difficult to manipulate thirty 5+ foot curved fibers during bundle construction. For this reason the fibers are first straightened using a heat treating process. This process helps to alleviate stresses within the fibers due to the manufacturing process. By minimizing the internal stress of the fibers we can reduce the risk of crazing or fracture that otherwise might occur during the bundle manufacturing process.
Procedure
This procedure will require 2 technicians.
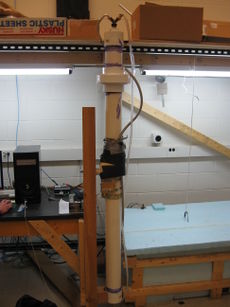
- Make room at a table for the unistrut straightening bar.
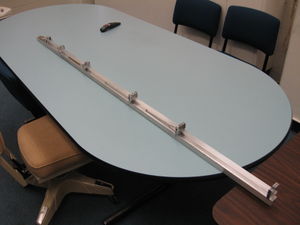
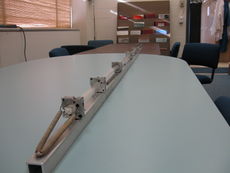
Full straightening setup.
- If the collars have been removed, set out:
- 7 fiber collars
- 14 half inch 4-40 screws
- Bundling tool
- Don a clean pair of gloves.
- Move 30 rough cut light guides from the intermediate storage box to the table where you will bundle the fibers.
- Bundle the light guides into the anchoring collar at one end of the aluminum bar where there are no springs between the collar and the end of the bar.
- Use the bundling tool to arrange the fibers into a 5x6 matrix.
- Rotate the bundle so that the fibers will fit in the anchoring collar.
- Screw the upper half of the collar to the lower half, but not too tightly. You want the fibers to be able to move through the collar.
- Use the flat face of a piece of aluminum to align the ends of the fibers flush so they all project the same distance beyond the anchoring collar, about a half inch. One worker may hold the metal, while the other pushes the fibers against it. Tighten the anchoring collar around the bundle so it will not slip.
|
|
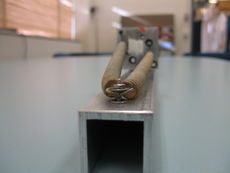
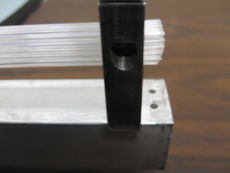 Fibers tapped until they all protrude about 1/2 inch. |
 Final view. This end is fastened and does not move with springs during bending. |
- Run your gloved fingers along the fiber towards the next collar, keeping the fibers in the same position of the matrix. If constant pressure is kept on the top, bottom, and sides of the bundle with your hands, the bundle stays in a square matrix and is able to be placed in the next collar very easily.
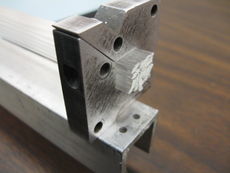
- Slide all the collars as far as possible toward the aligned end of the bundle. Make sure the bundle is straight. Tighten the collars just enough so that they do not slip when the springs are attached in the the next step. You can test this by trying to move the collar along the slots in the aluminum. If the collar moves, push it back to its original position and tighten the collar a little bit more. If it moves, repeat the procedure above. If it will not move at all, the collar is now tight enough.
The collars are attached in sliding brackets but should sit toward the aligned end of the bundle to start.
- Fasten springs to the collars to put the fibers in tension. Use sections of wire to tie the springs to the collars.
- These springs will ensure that the fibers have enough tension to be pulled straight rather than just lessen the bow between collars.
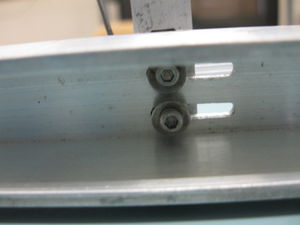
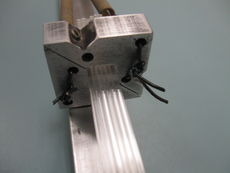
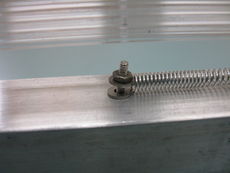 The anchored end of a spring is attached with a nut, screw and two washers as shown. |
 The floating end of the spring pulls on the collar via a wire loop. |
 The wire loop is tied through the collar in a double knot. |
 Final view. The collar is now applying tension to the fiber bundle. |
- The collar on the end opposite the anchor should be screwed down tight and fitted with two springs on the left and right, to ensure even tension.
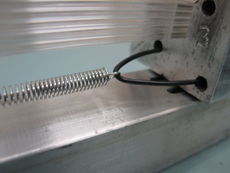
 The two springs on the end are anchored with a screw, nut and two washers as shown. |
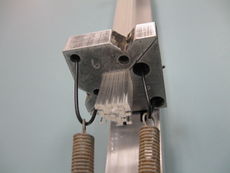 Each spring is attached to a wire loop through its side of the collar. |
 Each loop is tied in a knot on its respective side. |
 Final view. The last collar should now pull evenly on the bundle. |
- Insert the straightening bar into the empty PVC straightening pipe.
- One worker should tilt the pipe, and the other should remove the top cap and set it aside.
- While the one worker holds the pipe tilted, the other inserts the bar. Be careful not to knock the bundle against bars or pipes below the ceiling. Also, do not let the bar fall into the straightening unit. Set it carefully at the bottom of the pipe.
 The heat treating pipe in its vertical position. |
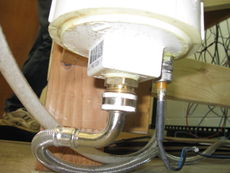 The bottom of the heat treating pipe showing the inlet for the thermistor used to measure the temperature in the pipe. |
 The top cap of the heat treating pipe unscrewed with valves 7 and 8 labeled. |
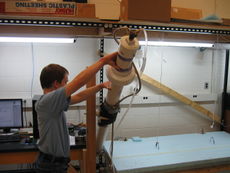 The heat treating pipe tilted sufficiently for the aluminum bar holding the fibers to be inserted. |
- Screw the cap back onto the pipe, making sure to hand tighten it.
- Fill the pipe:
- The valve for the air inlet hose (7) should be closed.
- Open valves 1, 3, and 6. Close valves 2, 4, and 5.
- Turn on the cold filtered water, and turn the water inlet valve 90 degrees.
- When the water starts coming out into the tank, open all the valves intermittently to bleed air out.
- After the air is expelled from the pipes, close all of the valves except for three and two.
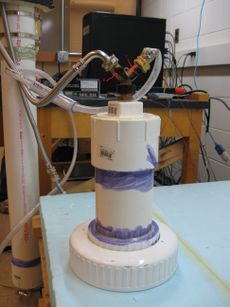
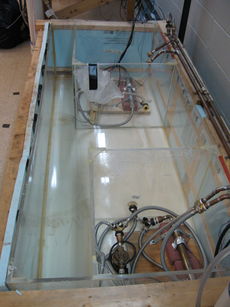 The "fish tank" bending unit. |
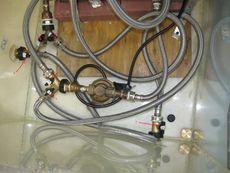 Valves one through six in the bending unit. |
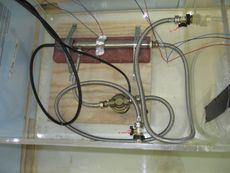 Valves 9 and 10 in the bending unit. |
- Run the LabVIEW program to heat the water.
- After the water has reached its maximum temperature it should cool for 12 hours before the straightening bar is removed from the pipe.
- After 12 hours or more, drain the pipe by opening all of the valves, including the one for the air inlet.
- One worker should tilt the pipe, and the other should remove the cap and take the bar out of the pipe.
- Replace the cap and raise the pipe to its vertical position.
- Set the bar on the bundling table.
- Unscrew all collars and remove the straightened bundle.
- Before putting a new bundle on the aluminum straightening bar, clean the straightened bundle with a damp lint-free cloth, label it, and put it in the intermediate storage box.


