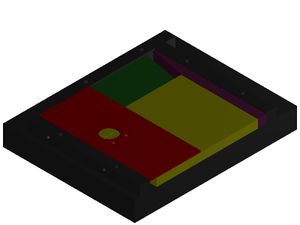
Tagger microscope prototype construction
Revision as of 16:32, 19 September 2007 by Nettleton (talk | contribs) (→Cleaving and Polishing Techniques)
This page contains the progress of the fabrication of the Tagger Microscope prototype. Now this is the first Wiki page that I have ever made so please excuse any errors, they will be corrected in a timely fashion. This page will be updated as more the project progresses. To see what I am currently working on see Weekly Goals.
Tools
- We designed our own apparatus to cut, polish, and glue the scintillators and the waveguides. For more information on how it works Work Stand Assembly.
- To cut the fibers I use a standard hobby knife.
- For cleaning and polishing acrylic fibers, the recommended tool to use is a plastic nail buff.
- A digital scale (accurate to ±0.01 grams) used to weigh out the proper proportions of the resin and catalyst.
- Glassware for weighing, mixing, and applying the epoxy.
- A Laboratory Hotplate is used to heat cure the epoxy.
- An inferred thermometer used for calibrating the hotplate.
For more information (such as prices and product numbers) on the equipment listed above see Supplies
Fiber Research
Epoxies
The two epoxies that are being tested are:
- BC-600 (Bicron) BC-600 Info
- 20-3238 (Epoxies Etc) 20-3238 Info
Cleaving and Polishing Techniques
Note: This process is assuming that the uncut scintillators and waveguides are in segments or spools of more then 3 meters long. Please read each step completely before you begin this process.
Step 1: Cleaving
- Place the fiber in the apparatus as shown in Work Stand Assembly under Cleaving. Take the hobby knife and place it on the fiber(again look under Work Stand Assembly for the proper placement of the blade) and gently tap the butt end of the knife until the fiber is cut cleanly. Remove fiber and inspect the freshly cleaved end. Look for any major breaks in the outer cladding (use magnifying glass if necessary). I will be posting pictures (as they become available) as to what is acceptable and unacceptable breaking in the cladding.
- If the ends of the cleaved scintillators have major breaks in the outer cladding, then the best course of action it to toss out the unusable segment, properly polish the end attached to the spool and repeat Step 1. If the ends of the cleaved scintillators are border line acceptable proceed to Step 2.
- For the waveguides, it is best to give yourself an extra 1/2 cm of fiber in case the cleaved end has major breaks in the outer cladding.
Step 2
- Scintillators: The segments cut using the Work Stand Assembly have an extra millimeter or so in length made by design so that by the end of the polishing process the segment will be of the proper length of 2 cm. That being said, if the fiber is border line unacceptable, see if the cladding is broken too far as not to be recovered by polishing.
- Waveguides: With that extra 1/2 cm you alloted yourself, it should be possible to recover, through polishing, most if not all the unacceptable fibers.
Step 3: Polishing
- Arrange the fiber in the apparatus as shown in Work Stand Assembly under Polishing. If the end to be polished is significantly longer then the desired length (i.e. 0.2 cm or more), begin with the coarse emery board . If total length is less than 0.2 cm of desired length, begin with the much less coarse nail buffs (pictures of the nail buffs will be posted).
- Note: It seems that the color of the nail buffs signifies how fine or coarse the buff is. So if you cannot find the exact nail buffs that I used, just try to match the color of each and you should be fine.
- Using the emery board is a bit tricky and needs special care. Gently grind down the end of the fiber with the board, do not push too hard or to soft. The strokes should be at a steady pace but not too fast or to slow (if you consider the up and down motion as one complete cycle the speed should be around 1 revolution per second). I know that these direction are a little obscure, so the best way to figure out just how fast and how much pressure to apply is to use a scrap fiber and practice for yourself. The reason why you do not want to go too fast or apply too much pressure is that it could (and most likely will) result in stripping the outer cladding around the fiber. After the fiber is polished down with the emery board, it is best to remove it from the apparatus and inspect it for major breaks in the outer cladding. This process should take about 30 seconds depending on how much you need to shave off.
- Use the nail buffs on the fiber in the order of Black, White, Gray (I used 3 different ones because they came in a set, but if you just use the first (black) and last(gray) i think you should be fine). With these you do not have to be as cautious as you did with the emery boards but still some care needs to be taken. Basically follow the same process as for the emery board. When you feel, through the buff, the fiber become smooth, it is time to switch to the next buff. Be sure not to over polish the fiber or round off the ends. If the ends are rounded, the epoxy will not adhere properly to the fiber.
- Pictures will soon be posted as to what the fiber should look like after each step.
