Fiber Measuring Procedure
Purpose
When the fibers come from the manufacturer, they have, of course, different widths at different points. If fibers are too thick or too thin, it makes it hard to bundle the fibers securely. We measure the fibers so that we can manage the problem, and avoid using fibers that are out of specifications. It is harder to use a fiber that is too thick than a fiber that is too thin.
Method
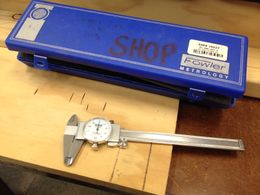
The fibers are laid down on a board which has the places to measure marked on it, and a Vernier, preferably plastic, is used to measure both transverse dimensions of the fiber. The dimensions are recorded in a Google sheet in millimeters.
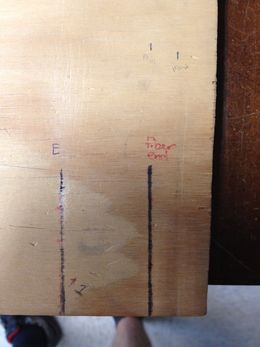
Note: In the summer of 2017, I (Micah Warren) labelled each measuring spot on the board with a letter A through E, using A to mean the upstream end of the fiber and E to mean the downstream end. This might be the opposite order than was used in past years. Before I labelled it, the board wasn't marked with letters, only the numbers 1 through 5, even though the old data logs had measurements from locations named with letters.
Procedure
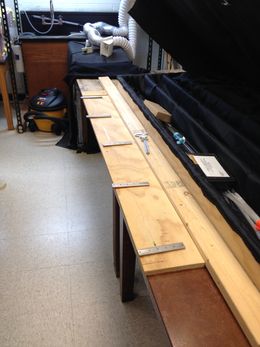
Before beginning to measure fibers, vacuum the working area, which is directly in front of the intermediate storage box. Set out several weights to hold the fibers down, and get out the Vernier. Lay down the fiber on the measuring board, with one end lined up at the mark labelled, "Fiber end," and measure the fiber at the marked points, which are equally spaced from each other by about 15 11/16". It is easiest to lay down the fiber by holding it about a third of the way from the left end in your left hand, holding the fiber curved upwards in an arc. Then use your right hand to line up the right end of the fiber with the mark, and place a weight on it. Then lay down the rest of the fiber, adding weights as you go. Five weights is a good number. If you place the weights on the points where you will measure the fiber, then when you take a weight off to measure the fiber, a large portion of the fiber is free to move, so you can lift the fiber a little bit off the board to measure it.
If you use a metal Vernier, be careful not to bump the jaws of the Vernier on the fiber, as this can scratch the fiber.


